Create Keys
Steps
- Create public and private keys (choose one of two methods)
- Method 1: Using command line;
- Method 2: Using key generation tool (recommended);
- Enter the generated public key in Teemopay and securely store your private key;
- Encrypt and verify signatures when calling APIs;
Operation Example
Step 1: Create Public and Private Keys (Choose One Method)
Method 1: Using Command Line
If you are using a Windows system, please open the “Command Prompt” (CMD) or “PowerShell”, execute the following command:
# Generate a 1024-bit private keyopenssl genpkey -algorithm RSA -out private_key.pem -pkeyopt rsa_keygen_bits:1024
# Generate a public key from the private keyopenssl rsa -pubout -in private_key.pem -out public_key.pem
If you are using a macOS system, please open the “Terminal”, execute the following command:
# If you don't have openssl installed, please install it first, otherwise skip this stepbrew install openssl
# Generate a 1024-bit private keyopenssl genpkey -algorithm RSA -out private_key.pem -pkeyopt rsa_keygen_bits:1024
# Generate a public key from the private keyopenssl rsa -pubout -in private_key.pem -out public_key.pem
Method 2: Using Key Generation Tool (Recommended)
Visit the website: Public/Private Key Generation Tool
Key length: 1024
Format: PKCS8
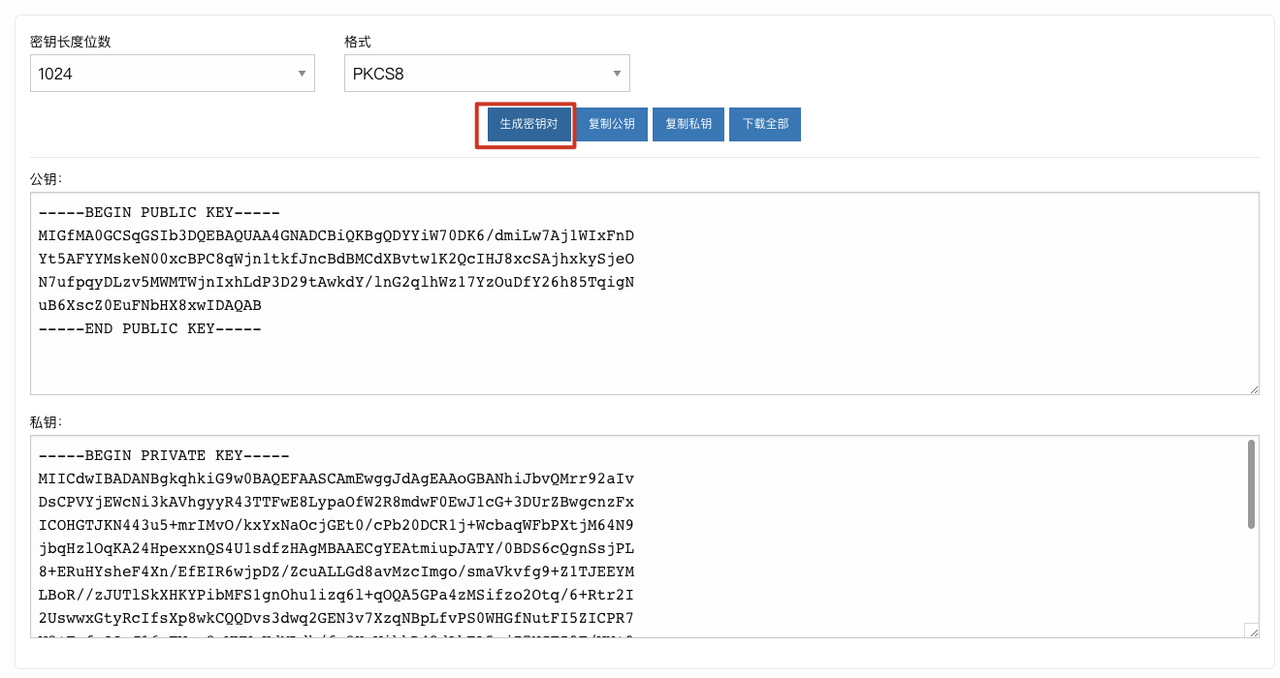
At this point, we get: public key and private key (do not use spaces and line breaks when using, please securely store the private key, and the public key will be used in the next step).
-----BEGIN PUBLIC KEY-----MIGfMA0GCSqGSIb3DQEBAQUAA4GNADCBiQKBgQDYYiW70DK6/dmiLw7Aj1WIxFnDYt5AFYYMskeN00xcBPC8qWjn1tkfJncBdBMCdXBvtw1K2QcIHJ8xcSAjhxkySjeON7ufpqyDLzv5MWMTWjnIxhLdP3D29tAwkdY/lnG2qlhWz17YzOuDfY26h85TqigNuB6XscZ0EuFNbHX8xwIDAQAB-----END PUBLIC KEY-----
-----BEGIN PRIVATE KEY-----MIICdwIBADANBgkqhkiG9w0BAQEFAASCAmEwggJdAgEAAoGBANhiJbvQMrr92aIvDsCPVYjEWcNi3kAVhgyyR43TTFwE8LypaOfW2R8mdwF0EwJ1cG+3DUrZBwgcnzFxICOHGTJKN443u5+mrIMvO/kxYxNaOcjGEt0/cPb20DCR1j+WcbaqWFbPXtjM64N9jbqHzlOqKA24HpexxnQS4U1sdfzHAgMBAAECgYEAtmiupJATY/0BDS6cQgnSsjPL8+ERuHYsheF4Xn/EfEIR6wjpDZ/ZcuALLGd8avMzcImgo/smaVkvfg9+Z1TJEEYMLBoR//zJUTlSkXHKYPibMFS1gnOhu1izq6l+qOQA5GPa4zMSifzo2Otq/6+Rtr2I2UswwxGtyRcIfsXp8wkCQQDvs3dwq2GEN3v7XzqNBpLfvPS0WHGfNutFI5ZICPR7V8+FufoOOnJ16nTWya8vWWWuKdMLdh/fn8HxWikkD42dAkEA5xjI7NGTZ9T/VN+9OiI+NiOnBnIfxo5gCQiyTd5tWcmQ5YBOwsGFK7BQr4FiBrTfrclrV6blYQApqeViMAhYswJAAo9sKyvpcrwU+u5ddbwoPXOLOZHoRMcVZDupE0PlOJwLf2YpIZXGOzQx40lsMZlG2MFhm7G7TWwraiSIY/Y2kQJBANAJ+edni6Gvl+RaPsk0xniKg/RDjON8jGvVjl6XXC22TWCtrzmYaUA5S4mTmiGbdrnGV4Hi1yAJu3gc7dV7zg0CQDEnqvJghWrWrRlt0KpVg0a6nsXDLxPtrzPTARsFGAt/qfvuozsiviIWzKKL/Iq6vsJvpuyOldfIyZPoMCcJuqc=-----END PRIVATE KEY-----
Step 2: Enter the Generated Public Key in Teemopay and Securely Store Your Private Key
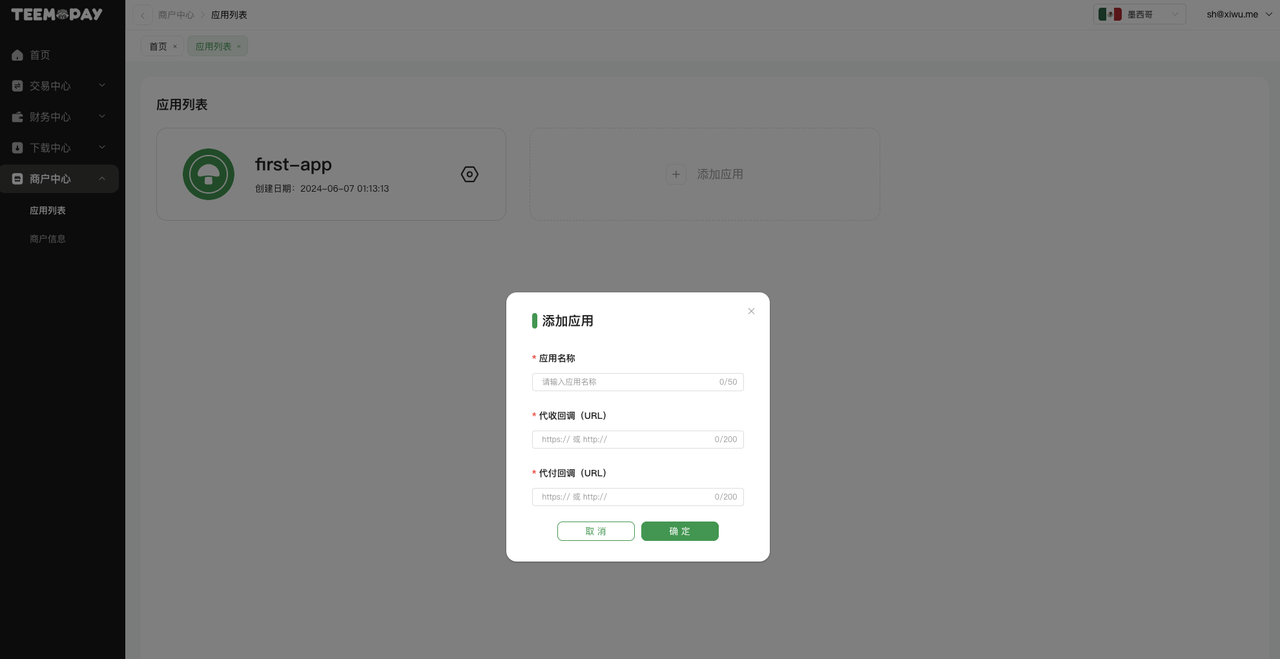
Page path: Merchant Center >> Application List
If you don’t have an application at this time, please click “Add Application” to create one;
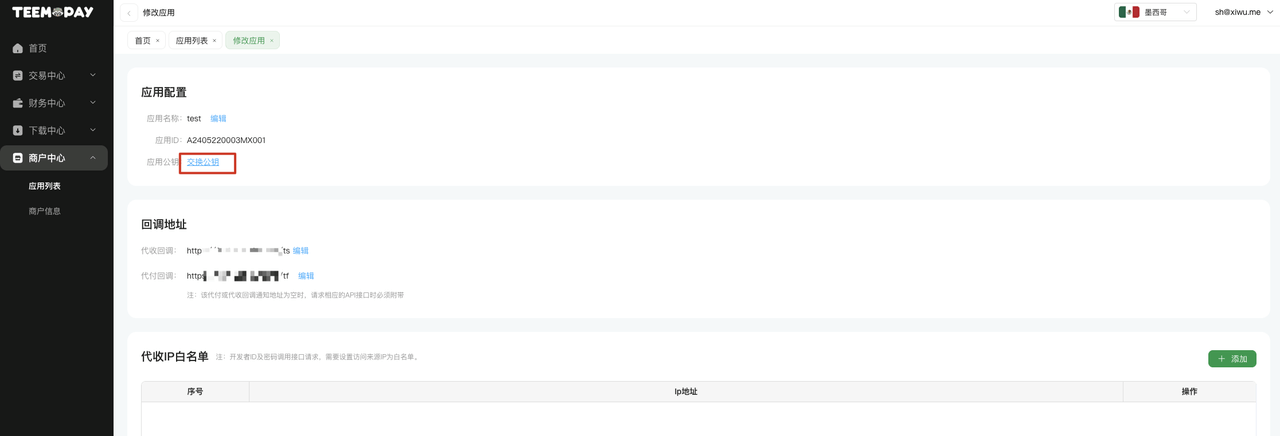
If you already have an application, please click the small gear icon, enter the application settings page;
In the application settings page, click the “Exchange Public Key” button, and enter the Google verification code in the pop-up window;
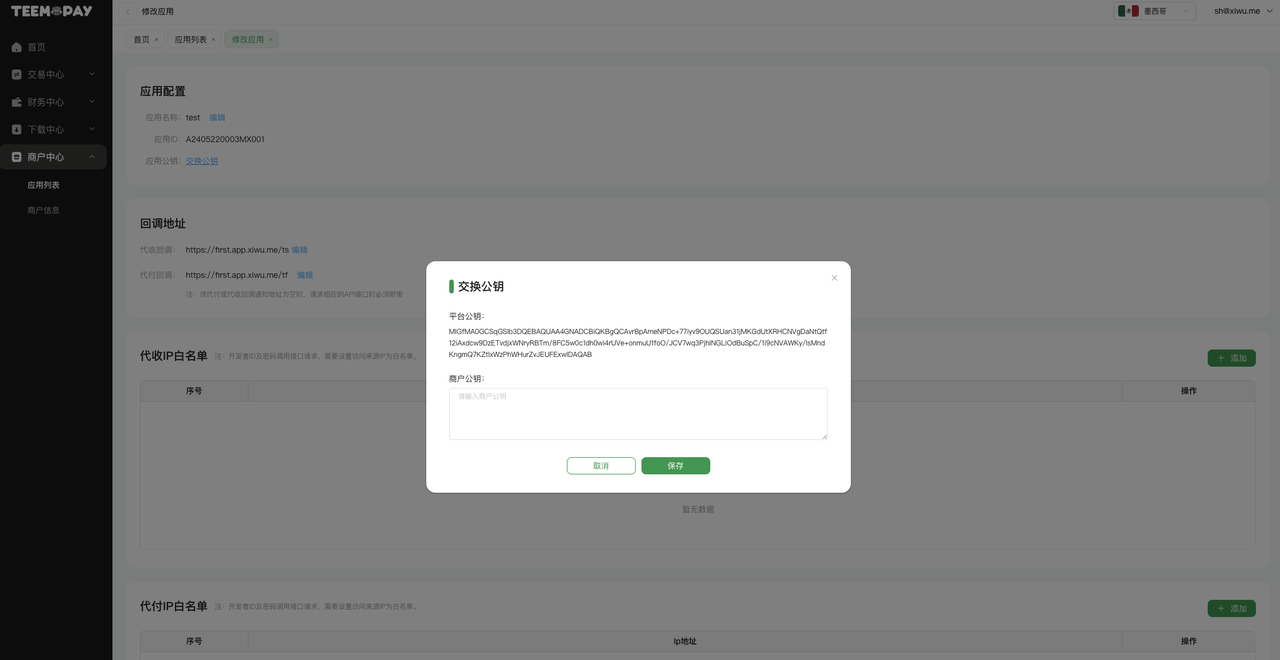
After verifying the Google verification code, we will see the following interface in the pop-up window:
- Fill in the public key generated in the previous step into the “Merchant Public Key” position in the pop-up window;
- Do not include the “-----BEGIN PUBLIC KEY-----” and “-----END PUBLIC KEY-----” parts when filling in;
- Copy and save the “Platform Public Key”, it will be used later;
- Note: The keys are paired, if you change the public key and private key, you need to change your merchant public key again;
Step 3: Encrypt and Verify Signatures When Calling APIs
Refer to the Authentication Example chapter.